
What restoration actually means
Water damage restoration is the ordered process of stopping a water source, removing standing water, drying the structure, cleaning affected materials, and rebuilding what could not be saved. Most homeowners picture only the fans and the final paint. The middle stages decide whether a job ends in days or turns into a second problem weeks later.
This guide walks the sequence the way a crew runs it in an Orem house. You will see the order, the tools, the choices that fall to you, and the points where a job stops being a do-it-yourself project. Read it once now so the order feels familiar if a supply line lets go at two in the morning.
The eight stages in order
Make the space safe
Check for electrical and gas risk first. If water touches outlets, the panel, or a ceiling light fixture, stay out and call 911 or the utility before anything else. Cut power only if the panel is dry and you can reach it without stepping in water.
Stop the source
Close the shutoff valve for the fixture, or the main valve if you cannot find it. A burst supply line, a failed water heater tank, and a stuck washer valve all end the same way. Photograph the failed part before anyone removes it.
Remove standing water
Crews use submersible pumps for deep water and truck-mounted or portable extraction units for carpet, pad, and shallow pooling. A wet vac handles a puddle but not a flooded room. Every gallon pulled out mechanically is a gallon the dehumidifiers never have to handle.
Inspect and map the moisture
Technicians run moisture meters across walls, floors, and ceilings, then scan with a thermal imaging camera to find wet zones behind finished surfaces. They log readings on a sketch of each room. That sketch becomes the baseline for every later drying check.
Remove what cannot be dried
Saturated carpet pad, soaked insulation, and drywall that has wicked water above the flood line are usually cut out. Hardwood, cabinets, and framing are tested before anyone decides to keep or tear them out. Removal opens cavities so air can reach the wet material.
Set up structural drying
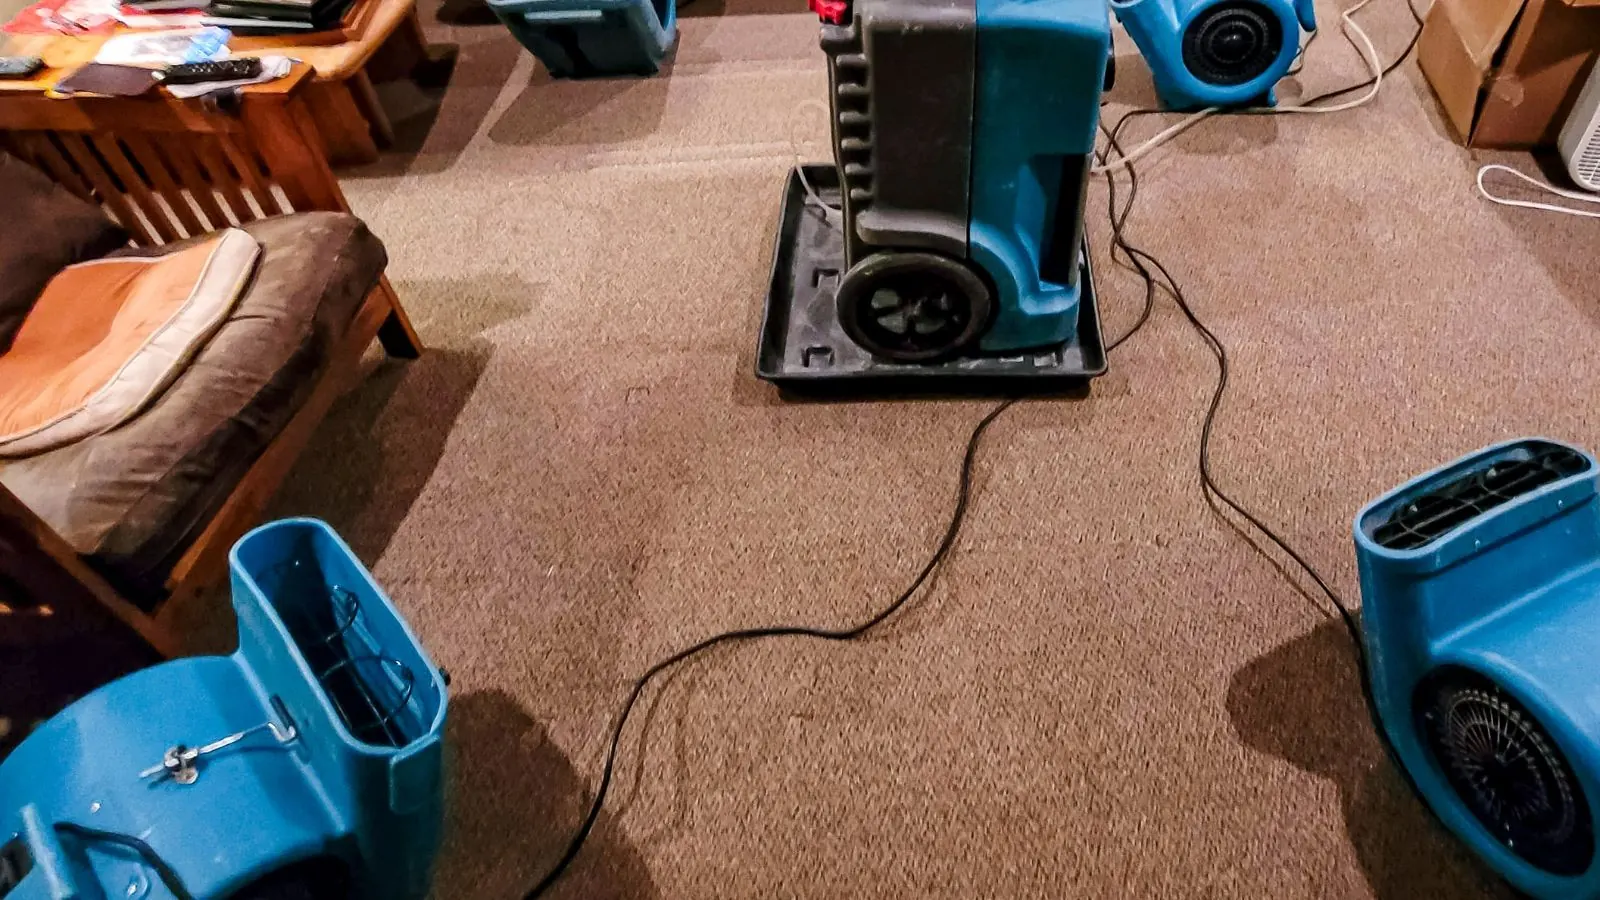
Air movers push dry air across wet surfaces while LGR (low grain refrigerant) dehumidifiers pull moisture out of the air. Placement follows the moisture map. Doors to unaffected rooms stay closed so the machines work on the right volume of air.
Clean and sanitize
Surfaces that touched water get cleaned, and contaminated water calls for antimicrobial treatment and disposal of porous materials. HEPA air scrubbers run when dust or debris is airborne. Contents such as lamps, books, and electronics are sorted into clean, restorable, and discard piles.
Verify dryness, then rebuild
Crews return to the same mapped spots and record readings until walls, subfloors, and framing match a dry reference taken in an unaffected part of the home. Only then do drywall, flooring, and paint go back in. The ANSI/IICRC S500 standard describes this drying goal, so ask any company whether its crews work to it.
Where is your job right now?
Use this grid to match what you see in the house to the stage you are in and the choice that comes next.
| What you see | Stage you are in | Your next decision |
|---|---|---|
| Water still running or dripping | Source not stopped | Shut the fixture valve or main valve, then call the 24/7 line |
| Standing water on the floor | Extraction | Keep out of the water if outlets or the panel are wet, and wait for pumps |
| Floors dry on top but walls feel cool or damp | Moisture mapping | Ask for meter and thermal camera readings, not a visual check |
| Carpet pad squishes underfoot | Removal decision | Expect pad removal and drying of the subfloor underneath |
| Loud fans and dehumidifiers running | Structural drying | Leave equipment alone, keep doors closed, and expect daily readings |
| Fans are gone but walls are open | Verification passed | Plan the rebuild and ask Orem Building Safety about permits |
| Musty smell returns after drying | Hidden moisture | Call back for new readings before closing walls or laying flooring |
What to document at each stage
Start your record before anyone touches anything. Take wide photos of each room, then close shots of the damaged surfaces and the failed part. Add a short video walkthrough narrated with the date and what you see.
During extraction and removal, photograph every material that leaves the house, such as pad, baseboards, and cut drywall. Keep a written list of damaged contents with brand, age, and where each item sat. Save the crew's moisture logs and equipment notes, since they show what was wet and how long drying took.
At the end, keep the final readings, the scope of rebuild work, and every receipt. If the loss involves a claim, your insurer will ask for these records. Ask your insurer which documents it wants rather than guessing.
Standing water or a wet wall in your home? Talk to a dispatcher now.
☎ Call (385) 988-9410Mistakes that stretch a restoration
- Waiting a day to see if the wet spot dries on its own
- Running a household fan while the crew is still mapping moisture
- Painting or sealing a wall that still reads wet on a meter
- Laying new flooring before the subfloor has been tested
- Throwing away cut materials before photographing them
- Turning off dehumidifiers early because the room feels dry
Tools and what you can safely do yourself
A homeowner can safely stop a small leak, mop a thin puddle, lift furniture legs onto foil or wood blocks, pull up area rugs, and open cabinet doors to let air in. Keep wet items away from clean ones, and move valuables to a dry room. These steps cost nothing in materials and protect more than they risk.
The tools that matter most are the ones a household rarely owns. A pin or pinless moisture meter reads water inside drywall and wood. A thermal imaging camera shows temperature differences that point to wet cavities. LGR dehumidifiers and air movers need correct placement, which is why we do not offer equipment rentals. Rented fans without a plan often leave wall cavities wet.
How long each stage takes
Safety, shutoff, and extraction move quickly because they depend on pumps and hands. Drying does not. Typical drying takes days, not hours, and the number depends on the materials, the starting moisture, and how much of the wet area was opened up.
Dense materials such as hardwood, plaster, and subfloor sheathing hold water longer than carpet. Rebuilding follows drying, and its length depends on the scope of cut-outs and the lead time for flooring and cabinets. A dispatcher can explain what to expect for your situation on the phone.
When to call a professional
Call when water has reached walls, subfloors, or ceilings, when the water is gray or black, or when more than one room is wet. These jobs need professional water mitigation to stop the spread in the first days, followed by water damage cleanup to remove contaminated materials and sanitize what remains.
Crews dispatched across Orem also work in Provo and Lindon, so the same sequence applies to homes just over the city line. We answer 24/7, and while you wait you can shut the water off, lift valuables, and keep people out of any contaminated area.
What Orem homeowners should know
Orem's culinary water runs through the Water Section of Public Works, which serves about 23,530 water connections from deep wells on the bench, two mountain springs, and treated Provo River water. Learn where your own main shutoff sits and where the city meter is before you ever need either one. A main-line break before the meter is a call to the city water line, not to a plumber.
The Orem Building Safety Division requires permits for work that remodels or repairs, with some exceptions, and for plumbing, electrical, heating, or air-conditioning work. Drying alone is not rebuilding, so ask Building Safety before your contractor opens walls for repair work. Ask who will pull the permit before the work starts.
Source types: Orem Water Conservation Plan, orem.orgFrequently asked questions
It depends on how much water, which materials got wet, and how much needs rebuilding. Extraction happens first and fast, then drying usually runs for several days. Rebuilding comes after drying is verified, so the full timeline is longer than the drying period alone.
Replacing drywall without drying the framing, insulation, and subfloor behind it traps moisture inside the wall. New board then sits against wet wood. Drying first, with meter readings to confirm it, is what protects the repair.
Not always. Air movers and dehumidifiers are loud and warm the house, and some rooms may be closed off. Sewage or heavily contaminated water usually means staying out of the affected area until cleaning is done. The crew will tell you which rooms to avoid.
A moisture map is a room sketch with meter readings written at each spot you can measure. It shows where water traveled, tells the crew where to place equipment, and gives you a record to compare against on later visits.
We do not offer rentals. Equipment alone does not dry a house, because placement, airflow, and daily readings do the work. If you tackle a very small spill yourself, keep fans aimed along the wet surface and keep checking it with a moisture meter.
Stop the source, lift valuables, and photograph everything first. Skip scrubbing or bleaching, since cleaning can hide evidence and spread contamination. Leave wet materials in place unless they pose a hazard, so they can be documented.
Close your main shutoff, and call 911 or the utility first if water is near the panel, outlets, or gas. If the break is on the street side of the city meter, contact the city water line. Then call our 24/7 line so a crew can be dispatched when available.